Sunday, May 12, 2013

Flaugnarde Flop

What is a flaugnarde, you ask? If you've ever heard of its cherry-studded partner, clafoutis, it's essentially the same thing but made with different fruit. It's a hybrid of cake, custard, and Yorkshire pudding, baked in a cast iron pan until puffed and golden brown.

This recipe is going to deviate slightly from the others, in that I'm going to make it on the barbecue. Nobody is quite sure when clafoutis/flaugnarde was first made, but it hails from Occitania, a region of Europe that is mostly in southern France but also spreads into parts of Italy and Spain. It is the homeland of many historical greats such as Eleanor of Aquitaine, Jean-François Champollion, and Henri de Toulouse-Latrec, as well as being the land of the medieval troubadours, wandering minstrels espousing courtly love and chivalry.


Lots of courtly love happening at this feast!

Occitan cuisine has a definite Middle Ages feel to it, and while the origins of flaugnarde are unknown, it's a safe bet that people were making something similar many centuries ago. This is the reason I'm making it in a big heavy iron pan and cooking it over a fire. Granted, I'm using propane instead of wood, but fire regulations don't allow me to build a wood-fired brick oven on the balcony!

ANYWAY. This flaugnarde uses nectarines and raspberries, with a batter containing buttermilk, so it should be lightly sweet with a little bit of tartness to it. If you don't have a barbecue, this can easily be done in an oven.

1 tbsp butter
2 cups diced fruit
1 tbsp lemon juice
3 eggs
1/3 cup sugar
1 1/2 cups buttermilk
1 tsp vanilla
1/4 cup plus 2 tbsp flour
pinch of salt
powdered sugar for dusting

- Preheat the barbecue to about 400 degrees Fahrenheit, and place a large cast-iron skillet on the grill to heat as well.
- Toss the fruit with the lemon juice and set aside.
- Combine the remaining ingredients into a smooth batter, and let rest for 5-10 minutes.
Thin, eggy batter.

- Once the barbecue is fully heated, place the butter into the hot pan and swirl to coat the bottom and sides. 
- Add about half the fruit to the pan, then pour the batter over top and sprinkle with the remaining fruit. 


The puffening begins!

- Turn down the heat to low, and bake until puffy and golden brown, about 30 minutes (if you're doing this in the oven instead, keep it at the same temperature, it won't burn like it would on the barbecue). A toothpick inserted in the center should come out clean.
- Let rest for 10 minutes, then sprinkle with powdered sugar.
Ta-daaaaah!

- Cut into wedges and serve.

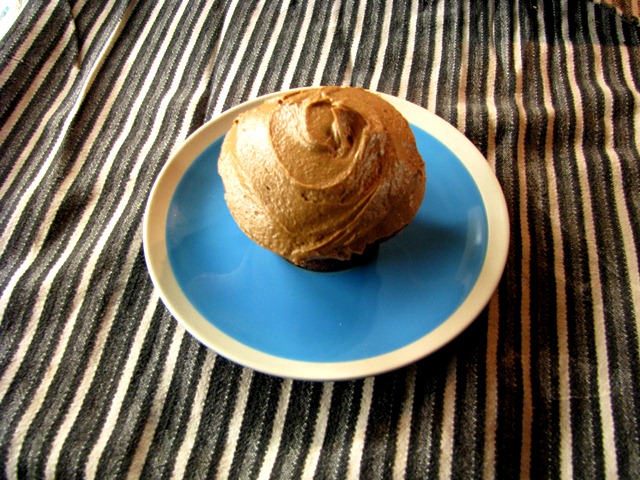
OKAY. Pretty straightforward, right? So here's where this went wrong: the serving stage. I had this beautiful, fluffy flaugnarde ready to serve, then decided "hey, why don't I turn this out onto a nice serving plate?" Aaaannd it collapsed into a heap. Thankfully it was still incredibly delicious, but if you're making this, keep it in the skillet for serving. 
Delicious fail.

Until next time,
-M

Wednesday, May 8, 2013

A Brief Note

Can we all agree that the most cringe-inducing word ever to be applied to food is "slurry"?

As in, "The fish are deboned and processed into a slurry".

That's all. 
-M

Tuesday, May 7, 2013

BEANS!

Not this kind of bean.

Ah, the humble bean. Easy to grow, cheap to purchase, efficient at causing flatulence. Aside from the latter, beans are one of the best things to cook. They have lots of fiber and protein, and are versatile as all heck.

Sure, you COULD buy canned, pre-cooked beans. Dried beans, however, are at least half the cost and require minimal effort to prepare. That's not to say canned beans aren't useful, though...sometimes you need insta-beans, for impromptu nachos or tacos. 

Still, if you were to throw a couple handfuls of dried beans into a bowl, cover them with water and leave them to sit overnight, by the time you drag yourself out of bed in the morning you'll have a bowlful of beans that are mere minutes away from being ready to eat. 

Next step: boil those beans! Most bean varieties have a toxin in them that will give you serious indigestion if they aren't cooked out. Drain your soaked beans, throw them in a pot with enough fresh water to cover them, and boil for at least ten minutes (soaking, rinsing and boiling the beans will help to reduce their gas-producing effects somewhat, too).

So now you've prepped some beans. Here's my vegetarian chili recipe...it has as many veggies crammed into it as possible. Meaty chili is a project for another day, this is cheap and tasty and edible for everyone!

(Makes a very large pot of chili)


THE BEANS:
3 cups dried beans (I usually do a mix of pinto beans, chickpeas, and black beans)
6 cups water

THE VEG:
2 tsp salt
1 large onion, diced
1 carrot, diced
2 stalks of celery, diced
2 cups sliced mushrooms
1 green pepper, diced
2 jalapeno peppers, diced (keep the seeds in if you want it spicier)
4 cloves garlic, minced
1 sweet potato/yam, peeled and diced (can substitute diced pumpkin or other squash)
1 small zucchini, diced
1 can of baby corn cobs (or 2 cups frozen corn kernels)

THE SPICE:
3 tbsp ground cumin
3 tbsp smoked paprika
1 tsp cayenne pepper
1 tbsp cocoa powder 
Salt and pepper, to taste

THE WET STUFF:
2 large cans of tomatoes, chopped
A bottle of your favourite beer (dark beers like stout or porter are perfect for this)
3 tbsp tomato paste
1/2 cup ketchup
Juice of 1 lime (or 2 tbsp vinegar)
Canned chipotle peppers, finely diced (if you can't find these, just add more spices, or use chipotle chili powder if you can find it)
Your favourite hot sauce, to taste

Alright. First off, the day before you plan on making chili, throw the beans into a big bowl or container and cover with the water.

The next day, drain and rinse the beans and pour them into a pot with enough water to cover them. Bring to a boil and cook for about 10-15 minutes until they've softened up slightly. Drain and set aside.

In a large stock pot, add a little bit of cooking oil and bring to medium-high heat. Add all the vegetables except the sweet potato, zucchini and corn. Saute until the vegetables begin to soften up.

Add in the beans and the spices, and cook, stirring often, for another minute or two. Then add the wet stuff and reduce the heat to medium-low.

Simmer for at least 45 minutes to 1 hour, stirring occasionally and tasting often (add more spices if desired, and keep tasting the chili until you're satisfied with the flavour). Once the beans are cooked to your liking, add in the remaining vegetables and simmer until they're fully cooked.

Top with sour cream and shredded cheese if desired, and enjoy!

Keep an eye out for more bean recipes...trust me, there will be many more!

-M


Thursday, May 2, 2013

Science Project #1: The Cupcake Experiment

Alright, so I got my hands on some gluten-free cake mix from the bulk food store. Before I make the wedding cake, I figured it made sense to do a few test runs. The boyfriend and my co-workers agreed to be my test subjects, so today I'm baking chocolate cupcakes.

Normally, cupcakes (and cake in general) are on my list of foods that get a resounding "meh" from me. Don't get me wrong, I like sweets, but anything cake-based just doesn't do it for me. Give me a pie, or a cheesecake, and I'll happily dive in face-first. Cutesy cupcakes, or those nauseatingly sweet cake pops, will never be as satisfying to me as a slice of lemon meringue pie.

ANYWAY. So I decided to bake cupcakes, because despite my opinions on the matter, the rest of the world seems to like the damn things.

I used the recipe here, but with a couple modifications because I can't leave well enough alone. Instead of oil I used melted butter (because I will use ANY excuse to incorporate melted butter), instead of water I used milk, and I reduced the amount of cake mix by about 5 tbsp to incorporate that amount of cocoa.

A quick whiz through the mixer resulted in a smooth batter that was unbelievably sticky. I assume that has to do with the tapioca and xanthan gum. I poured it into a non-stick muffin pan that was greased up with some butter, because I didn't have any frilly cupcake liner things. Getting the batter into the cups was a challenge, and as you can see from the picture it was a bit of a mess. OH WELL, that's the dishwasher's problem, not mine.

Goopy!

Approximately twenty minutes later, I checked on the cupcakes as they were baking. They had pretty much doubled in size and looked like giant chocolatey mushrooms, which was promising. While they were in the oven, I contemplated the frosting over a glass of whiskey.
It's alarming how often liquor is a factor in my decision-making.

I decided that a coffee-flavoured frosting would be great for these cupcakes, since I'd be taking them to a morning meeting full of caffeine fiends. 

The cupcakes came out of the oven after about 35 minutes, and I let them sit for about 5 minutes before popping them out of the pan. After lifting out of the pan without the slightest resistance (a moment I was NOT expecting), I proclaimed myself a culinary sorceress and put them on a rack to cool off. 

These puffed up REAL good, uh huh.

Next, I whipped up a quick batch of frosting (use your favourite recipe- I frequently just make things up as I go along so I can't recall specific measurements), substituting strong coffee for the liquid and adding about a 1/2 cup of melted chocolate. 

That's a cupcake, all right.

I foisted one of these onto my ever-willing partner, and he proclaimed them as tasty. SUCCESS!

Until next time,

-M

Thursday, April 18, 2013

Science Project #1: Wedding Cake, plus some ramblings about gluten.

So I've been asked to bake the cake for my cousin's upcoming wedding. I've made dozens of fancy-ass cakes before, including a Super Mario-themed wedding cake a couple years ago for a friend of mine (which was easily one of the most stressful culinary projects I've ever embarked upon).

However, this is going to be a first on two levels: A) it's going to be a very traditional 3-tiered cake with flowers and royal icing and all that, and B) it must be gluten-free. This second part is much more of a challenge, as my experiences so far with gluten-free baking have yielded mixed results.

One of my coworkers has a gluten intolerance, so I've brought in various gluten-free treats that have passed the taste-test. I wasn't entirely satisfied with the results myself, but I'm a harsh critic of my own work.

Over the next few weeks I'll be experimenting with gluten-free cakes, and documenting the results. Luckily I've got plenty of people who heard about this project and immediately asked (er, demanded) to be guinea pigs, so I'm not gonna end up with a fridge full of cake.

Stay tuned- next up will be a trip to the bulk food store to scope out ingredients!

-M

Monday, April 1, 2013

Hector's Favourite Dog Biscuits

Shortly after we got our dog Hector, I started making homemade dog biscuits. They cost practically nothing compared to store-bought treats, plus you can control what goes into them. My recipe varies a bit depending on what I've got on hand, but here's what I did this time around.

I made turkey stock last night from the remains of the Easter-bird. Once all the stock had been strained out, I was left with a bunch of bones with a ton of meat still stuck to them. That meat is perfect for dog biscuits, because it's fully cooked and soft.

I separated the cooled meat from the bones and threw it into the food processor along with the carrots and celery that had been in the stock pot (Dogs and kids alike can always benefit from the sneaky addition of vegetables).

I ground up the meat into a fine paste, and added some leftover mashed potatoes along with a couple of egg whites. To make it less sticky, I added some brown rice flour until the consistency was like soft cookie dough.
Mmm, meat paste.

Next, I added a healthy sprinkle of fennel seed, because Hector has been tormenting us with his toxic dog breath lately and fennel seed has a pleasant licorice flavour and scent, in addition to being good for digestion. I gave him some of the raw dough and he nearly took my fingers off, so I took that as a "yes" to the question of whether or not dogs like fennel.
Hector patiently waits.

I rolled the dough into 1-inch balls and flattened them, then baked them in a 400-degree oven for about 30 minutes.
Ready for the oven.

These take a lot longer than people-cookies, as there aren't any fats or sugars in them to promote browning.
Depending on how soft you want the cookies to be, check on them every ten minutes or so until they're done to your dog's satisfaction. Hector's all about the crunchy stuff, but older dogs might want something softer.
Little crunchy biscuits!


RECIPE: Hector's Breath-Busting Dog Biscuits

(All measurements are approximate, as ingredients can vary)

3 cups cooked lean turkey or chicken
2 egg whites
1 small carrot, cooked until soft
1 stalk celery, cooked until soft
1/2 cup mashed potatoes
3/4 cup brown rice flour
6 tbsp. fennel seed

OVEN: 400 degrees Fahrenheit

- Grind up everything except the rice flour in a food processor, until mixture forms a soft paste.

- Gradually stir in flour until mixture becomes doughy enough to roll into balls.

-*NOTE* If you want to get fancy and use a cookie cutter, just add more flour until the mixture is strong enough to be rolled out and cut into shapes.

- Roll into 1-inch balls, flatten slightly, and place on parchment-lined baking sheet.

- Bake for about 30 minutes, turning and checking every ten minutes or so, until done to your dog's liking.


VARIATIONS:

- In place of mashed potato and fennel seed, use mashed sweet potato and rosemary.

- Omit carrot, celery and fennel seed, and add 1/2 cup natural peanut butter (chunky of course)

- Use lean cooked beef instead of poultry, and add grated parmesan cheese instead of fennel seed (parmesan is great for adding cheesy flavour since it's very low in moisture and fat but high in flavour, so a little goes a long way)

- For dogs with extra-bad breath, add 4-6 capsules of activated charcoal. This can usually be found among the herbal supplements, and is good for digestion (it's also a great way to prevent a hangover!). Pop open the capsules and add the powdered charcoal to the mixture. Finely chop a large handful of parsley or mint and add it as well.


-M

Friday, March 15, 2013

Outside the Comfort Zone

Down the street from where I work is a fantastic Asian supermarket called Sun Wah. This place has basically everything one could ever need, it's reasonably priced, and a great opportunity to try new things. If you've never gone shopping anywhere but the big-box chain supermarkets, you're missing out on an entire world of ingredients.

This list is more of an introduction to the world outside Safeway, rather than a "hey look at this weird shit I found" list. If you've tried any of these foods or have a suggestion for others, let me know!

1. Pandan extract:
 
This is a neat alternative to vanilla. It's a bright green syrup that gives food a nutty, sweet flavour almost like toasted marshmallow. Pandan extract comes from the leaves of a tropical plant, and when I say bright green, I mean BRIGHT green, as in it will turn anything you put it in a delightful lime colour. It's great for cookies, cake, puddings, and so on.

2. Sweet soy sauce (kecap manis):
This is probably the least-unusual item on the list. It's a sticky, sweet soy sauce that's good for marinades, stir fries, dips, and so on. I like mixing it with sriracha for dipping potstickers, or just using it on rice instead of regular soy sauce.

3. Konjac jelly shrimp:
These things are just straight-up cool. They're made from konjac, which is similar to a yam, made into a jelly-like substance which has a texture similar to cooked shrimp or squid (a little rubbery, but not in an off-putting way). These are vegan-friendly, and like shrimp they can be seasoned in a ton of different ways. Konjac jelly is also made into other shapes, including noodles, and the texture is really a love-it-or-hate-it deal. It's inexpensive and worth a try.

4. Mochi ice cream:
Ice cream, in a chewy rice wrapper. The texture of the rice cake exterior is like cake fondant or marzipan, plus these are bite-sized and addictive enough that you'll probably eat a whole box in one go. I've never looked at the nutritional information to see exactly how unhealthy these are for you, and I probably never will, because deliciousness trumps nutritiousness in this case.

5. Banana leaves:
If you've got a barbecue at home, get yourself some banana leaves and start wrappin' shit up. I've used these to hold rice, fish, chicken, and so on. The leaves themselves aren't really edible since they're pretty tough, but they give the food a subtle flavour while providing a biodegradable wrapper. They hold together even after they've been charred a bit, so they can handle relatively high heat. If you don't use it to wrap individual portions, consider something like this instead. 


Bottom line is...grocery shopping shouldn't be a chore, it should be an adventure! Think of yourself as a culinary Joseph Banks, braving uncharted territories for the sake of knowledge and new experiences. Trying foods you've never had before is such a low-risk way to broaden your perspective and your tastes, it would be foolish not to. 

-M